Pluck the Turkey (Note Review)

What You Need:

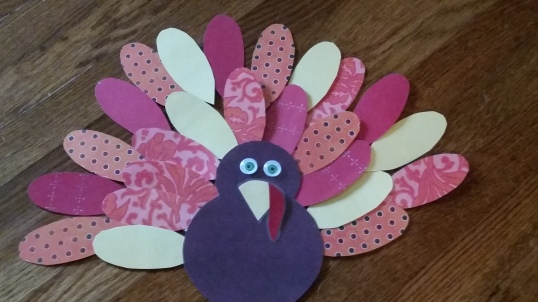
  • A turkey body, plus a lot of feathers
    • I cut mine out of scrapbooking paper so they were already in cute patterns.
    • If you want to be able to reuse it for multiple purposes, laminate everything. Otherwise, don’t bother.
  • Flashcards with the notes of the staff.
  • Some kind of timer (only needed for version 2)

Setup:

  • Write on the back of the feathers. (Use a whiteboard marker if you laminated.)
    • About three should say “Teacher Loses a Turn”
    • About three should say “Freebie”
    • Half of the rest should say “N” for name the note.
    • All of the rest should say “P” for play the note.
  • Lay out your turkey on the floor.


How to Play (Version 1, the competitive way):

  • The first player plucks a feather from the turkey and draws a note flashcard.
    • If the feather says “N,” the player should name the note on the flashcard.
    • If it says “P,” the player should play the note on the piano.
    • If it says “Freebie,” they get the feather for free.
  • Take turns until the turkey is completely plucked. Count the feathers to see who has the most.
    • The teacher loses a turn cards guarantee that the student will always have more. None of my kids picked up on this.

How to Play (Version 2, the timed way):

  • With input from the student, determine how long the student will need to completely pluck the turkey. (The amount of time varied from 1 to 5 minutes, depending on the level of the student and the number of feathers on the turkey.)
  • When the timer starts, the student plucks one feather at a time and plays or names the note. In this version, the teacher loses a turn feathers are just like a freebie feather.
    • (Occasionally, I surreptitiously stop the timer while they aren’t looking to make sure they finish in time.)

20171106_071908

Slash the Note Race

Here’s a game to practice note reading. It’s based loosely on any number of digital games where you have to slash, shoot, or twist a series of items before the time runs out.

What You Need:

  • At least two pages with notes on it. You can use copies of actual music, or you could use any number of note drills like this one from Making Music Fun or this one from Susan Paradis.
  • Sheet protectors
  • A set of cards with A through G on it, shuffled
  • Whiteboard markers
  • Timer

Setup:

  • Put your pages of notes in the sheet protectors.

How to Play:

  • The student draws a card to determine what note to look for. If necessary, go over where those notes are on the staff, so they have it in mind. You can do this just by talking it through, or you can show them a flashcard with the note on it, depending on the age and skill level of the student.
  • Set the timer. I generally start with 45 seconds for the student.
  • When the timer starts, hand the student one of the sheet protectors with music in it. The student has 45 seconds to use a marker and slash through each instance of the note on their sheet.
  • As the teacher, I have to wait until there are only ten seconds left before I can begin slashing the notes on my sheet. (Having only ten seconds means I generally can’t finish the sheet, which brings my score down below the student’s score.)
  • When time is up, swap sheets for scoring. Both teacher and student get two points for each correct slash, but they lose one point for each note they slashed incorrectly or should have slashed and didn’t. There is also a four point bonus for having found everything on the page.
  • If time permits, play another round with a different note. Vary the amount of time according to the student’s ability.

Variants:

  • To make it easier, use music that only has treble or bass clef on it and stays within one position. For example, music where the only C will be Middle C.
  • To make it harder, use more complicated music with lots of notes, including notes that are in harmonic intervals or notes where a key signature needs to be taken into account.
  • To make it harder or easier, give either the student or yourself a different amount of time to complete the task.

20170913_123323

Pictionary (Music Twist)

Here’s a music game based loosely on Pictionary. I teach private lessons, so we never have enough people for the actual game of Pictionary. This is a non-competitive version for two people.

What you need:

  • At least one set of cards with the letter names on them A through F.
  • Optional: a set of cards with other musical concepts on them. I wrote these out by hand in a few minutes, but some examples would be: quarter note, whole note, soft, loud, crescendo, repeat sign, bar line, etc. It is important that you actual write these out; don’t use the symbol.
  • A bag or bowl or something to draw the cards out of.
  • Whiteboard (or paper) with a large staff on it. Click here for a paper version.
  • Whiteboard markers (or other writing utensil)

Setup:

  • Put the cards in the bag or bowl.
  • Determine how many points you are going for.

How to Play:

  • The first player draws a card out of the bag and does not show it to the other player. If it’s a note name, she draws it, including the clef. If it’s a concept, she draws the symbol for it, such as “p” for soft, “f” for loud, etc.
  • The second player guesses what was on the card. If he gets it right, a point has been earned. You can keep track of this with tally marks if you’re trying to be quick and simple. I did it with smiley faces, and most of my students enjoyed drawing those. You’re working together as a team, so there is only one set of points to keep track of.
  • On the next turn, the second player draws and the first player guesses.
  • The game ends when the points goal has been achieved.

Variants:

  • For pre-readers, use a printout of a keyboard, instead of a staff.
  • For more advanced readers, specify an interval, such as a third. Draw the note a third above the note on the card, instead of the actual note on the card. The second player still guesses the note on the card, not the one drawn on the staff.
  • To make the game move along if you’re running out of time, make the last one a double or nothing challenge, or a triple or nothing challenge.
  • If the player draws a card and doesn’t know what it means, either set it aside and draw again, or show it to the teacher and have a discussion about it.


20170810_094259

Colorful Intervals

This week I played a game to practice the concept of intervals:

What you need:

  • A set of cards with intervals
  • Two keyboard sheets* printed out and laminated or put in a sheet protector
  • Whiteboard markers, preferably in a variety of colors

Setup:

  • Shuffle the cards.
  • Each player should label Middle C with a whiteboard marker.

How to Play:

  • The first player draws a card and names the interval. Once you have named it, color in the entire interval (meaning the top note, the bottom note, and all notes in between) on your keyboard. This ends the turn.
  • The second player follows the same process.
  • If you have already colored in some or all of the notes contained in the interval on the card, you can color in an equivalent interval anywhere else on the keyboard. For example, if you draw a fourth from middle C to F, but you’ve already colored those notes, you can draw a fourth from G to B above it.
  • If your keyboard is so full you cannot find an equivalent interval, color in the largest interval you can find and name it.
  • The first person to completely fill their keyboard wins.

20170724_112435

*My keyboard sheets are from Kristin’s site at http://www.myfunpianostudio.com/. I highly recommend her Piano Magic improv course.


Phase Six (Music Twist)

Here’s a rhythm game based on the idea of Phase Ten.

What you need:

  • A set of cards with quarter notes, half notes, dotted half notes, etc.

Setup:

  • Remove any cards the student hasn’t learned yet, such as dotted quarter notes or eighth notes.
  • Deal out five or six cards to each player. (Five will be harder; six will be easier. Neither are particularly hard since the point is to create and practice workable rhythms.)
  • Place the rest of the cards in a stack and flip one card over.
  • Make sure you know what the phases are. You can print these instructions out, but I just hold this list in my head. Not printing it out means you are free to make it harder or easier depending on how the student is doing.
    • Two measures in 4/4 time
    • Two measures in 3/4 time
    • Three measures in 4/4 time
    • Three measures in 3/4 time
    • Four measures in 2/4 time
    • One measure in 3/4 time followed by one measure in 4/4 time

How to play:

  • The first player attempts to rearrange the six cards into the first phase (two measures in 4/4 time).
  • Most of the time, it will be possible to complete the phase. The player counts and claps it. If the player can’t create the phase, she can pick up the flipped over card, or she can take the top card from the stack. She also discards one of the cards she doesn’t want. It becomes the new flipped over card. Her turn is now over.
  • The second player attempts to rearrange his cards into the first phase, following the same rules.
  • Once one player has successfully counted and clapped a rhythm, the other player has one turn to also complete the phase. Whether she does or not, the round ends. All cards are gathered up. New cards are dealt out.
  • Anyone who has successfully counted and clapped a rhythm in that phase can move on to the next phase. Anyone who has not yet completed the phase, must try that phase again on the next round. The person to complete the sixth phase first is the winner.

Variants:

  • To make it easier, change the phases. For example, you can require only one measure of 4/4 in the first round.
  • To make it harder, remove the Wild Cards or add an additional rule. For example, only one measure can contain a rest or all rhythms must include an eighth note.
  • To make it shorter, say that whoever is further ahead when the lesson ends is the winner, even if not all phases are complete.
  • To make it longer, imagine new phases. You may need to deal out more cards if you go for more measures.
  • To make it more likely the student will win, deal fewer cards to the teacher on each round. Or, tell the student you might make a mistake in your counting and clapping. If she catches you and can point to the place you clapped wrong, you have to repeat that phase on the next round.

20170713_061821.jpg